
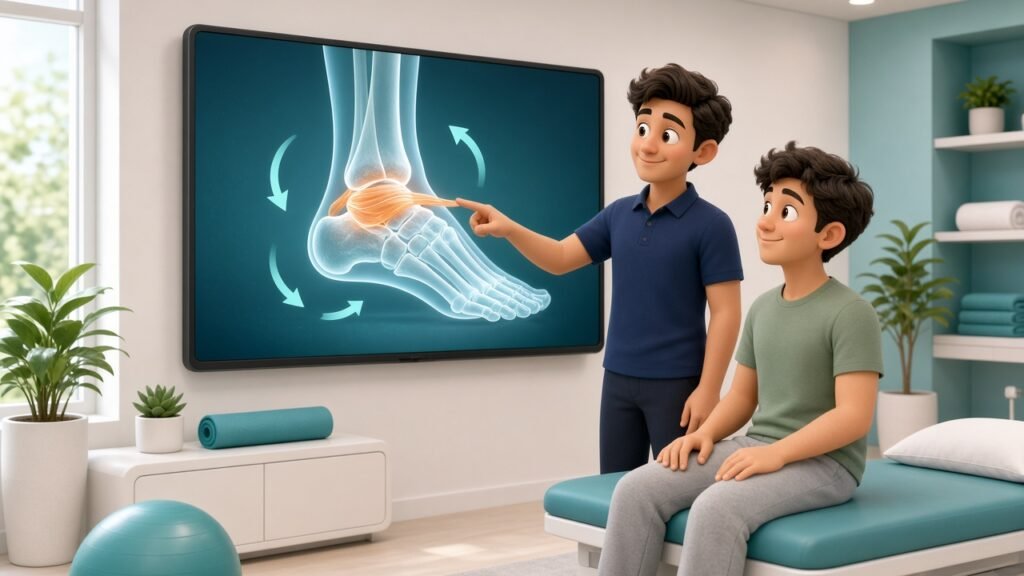
Almost every week in the clinic, I watch the same moment happen. I explain an injury, the patient nods politely, and I can tell from their face that very little of it has landed. They heard “ligament” and “inflammation” and “load”, and somewhere in the middle they stopped following.
For years I tried to fix this with better words. A plastic spine model helped a bit. Drawing on a whiteboard helped a bit more. But the thing that really changed how patients understood their own bodies was a short, simple 3D animation they could watch, pause and watch again at home.
This post is a practical how-to. If you’re a physiotherapist and you want to explain injuries with 3D animation, I’ll walk you through how to turn one explanation you already give every day into a clear visual story your patients can actually follow.
Why words alone often don’t stick
When someone is in pain, they’re not in a great state to learn. They’re worried, a bit tired, sometimes scared about what the injury means for work or sport. You can give the clearest verbal explanation in the world and most of it will be gone by the time they reach the car park.
Patients also can’t see inside their own body. When you say “you’ve strained the ligament on the outside of your ankle”, they have nothing to picture. So they fill the gap with whatever they’ve read online, and that’s often the scariest version.
A good 3D explainer gives them the picture. They see the ankle, they see the ligament, they see it stretch as the foot rolls. Suddenly your advice about bracing, early movement and gradual loading makes sense, because they understand what you’re protecting.
Step 1: Pick one injury you explain all the time
Don’t start with your rarest or most complex case. Start with the explanation you’re tired of repeating. For most physios that’s something like:
- A lateral ankle sprain
- Non-specific low back pain or a disc irritation
- Patellofemoral knee pain on stairs and squats
- Rotator cuff irritation when lifting the arm overhead
- Tennis elbow from gripping and typing
Choose one. You’ll get far more value from one well-made explainer for a common problem than five rushed ones. Common problems also mean more people searching and asking about them, so the video keeps earning its place.
Step 2: Write down how you explain it in the room
Before you think about animation, record yourself explaining the injury the way you would to a real patient. Use your phone. Then listen back and write it out.
You’ll notice a few things. You probably use an analogy or two that works. You probably answer the same follow-up questions every time. And you probably say a few things that only another clinician would understand.
That transcript is the raw material. Keep the bits that land with patients. Cut the jargon, or translate it. “Grade 2 ATFL sprain” becomes “you’ve stretched and partly torn one of the small straps that hold the outside of your ankle together.”
Step 3: Turn it into a simple story with a beginning, middle and end
Patients follow stories much better than lists of facts. A clear injury explainer usually has four parts:
What is it?
Show the healthy structure first. The ankle at rest, the ligaments doing their job. Keep it calm and clean so the viewer gets their bearings.
What happened?
Show the mechanism. The foot rolls inward, the ligament on the outside stretches too far. This is the moment the patient goes “oh, that’s exactly what I did.”
Why does it hurt and swell?
Explain the body’s response in plain terms. Show the area getting a little warmer and puffier as the body starts to heal. This is where you calm fears, because swelling and bruising look alarming but are often a normal part of healing.
What helps, and who to see
Finish with what recovery looks like: protecting it early, getting moving again, then building strength and balance so it’s less likely to happen again. End with a clear line that a physiotherapist can assess it properly, and that they should get urgent help if certain warning signs show up.
One style I like a lot is letting the body part tell its own story. The ankle itself has a friendly face and explains, in the first person, what went wrong and what it needs. It sounds playful, but it works because viewers instantly know who’s talking and what the video is about. It’s informational first, with a bit of warmth, not comedy for the sake of it.
Step 4: Keep it short
Most patient explainers work best somewhere around 30 to 60 seconds. That’s enough for the four parts above if you’re disciplined. If you find yourself needing three minutes, you’ve probably got two or three videos hiding in one script. Split them.
A short explainer also travels further. It fits on Instagram, it fits in a WhatsApp message to a patient, and it fits on your website without making the page heavy.
Step 5: Check it like a clinician, then like a patient
Once you have a draft script or storyboard, review it twice.
First, as a clinician. Is the anatomy right? Are you showing the correct structure, in the correct place, moving the correct way? Are you over-promising anything about recovery time? Every person’s recovery is different, so the video should say that, not hint at a guaranteed timeline.
Second, as a patient. Hand it to someone who isn’t in healthcare, a family member or your front desk team, and ask them to explain the injury back to you after watching. If they can’t, simplify. This one check will improve your video more than any fancy rendering.
Also make sure the video is general education, not a diagnosis. A line like “this is general information, please get your own injury assessed” protects both you and the viewer.
Step 6: Decide where each video will live
An explainer that sits in a folder doesn’t help anyone. Before you make it, decide where it will be used:
- In the clinic: on a tablet or screen during the first session, so you can pause and point
- After the session: sent to the patient so they can rewatch and show their family
- On social media: as a Reel or short video that answers a question people are already asking
- On your website: on the page for that condition, so people searching for it understand the problem before they book
That last one is underrated. Someone searching late at night about their sore ankle lands on your page, watches a clear 45-second explainer, and now you’re the clinic that helped them understand it. That’s a very different first impression from a page of dense text.
Doing it yourself vs. getting help
You can absolutely start simple. Some physios use basic animation apps or anatomy tools and do a decent job. If you enjoy it and have the time, go for it. The script and story steps above matter more than the software.
The catch is time and accuracy. Good 3D medical animation takes modelling, motion, lighting, voice, captions and a lot of checking. Most clinic owners I speak with would rather spend those hours with patients.
This is exactly the work we do at Rehabitize. Our Pixar-style 3D medical animations include pain explainers and injury recovery videos made for physios, sports rehab clinics and orthopaedic practices. Because I’m a physiotherapist myself, the clinical checking is built in, not bolted on at the end. You can see the kind of work we make in our portfolio.
A quick checklist before you hit publish
- One injury, one video
- Healthy structure shown first, then what went wrong
- Plain words, no unexplained jargon
- Calm tone that reduces fear, not adds to it
- No promised recovery timelines
- A clear “get assessed” line and warning signs where relevant
- Captions on, because many people watch on mute
- A plan for where the video will be used
Start with the explanation you give most
You already have the knowledge. You explain these injuries every single day. A 3D explainer just lets that explanation keep working after the patient has left the room, and reach people who haven’t found you yet.
Pick the one you repeat most, write out how you say it, and shape it into a short story. That’s the whole starting point.
If you’d like a simple plan for your clinic’s content, download our Free Marketing Blueprint. And if you’d rather we build your injury explainers for you, get in touch with us here.
Dr. Lakshay Sharma PT